

Concrete Reclaimer Fabrication Essentials for a Longer Service Life
2026-11-17
Concrete reclaimers rarely die of old age. More often, their service life is decided long before they hit the site—in material choices, weld quality, and how well the fabrication anticipates abrasive slurry. Sinou builds around those details from the start. The essentials below are what separate a reclaimer that lasts from one that quietly eats your maintenance budget.
Material choices that decide how long the drum and paddles actually last
Material selection does more than set the price of a mixer; it decides whether the drum and paddles develop deep scoring in six months or keep their profile for years. Mild steel plate is cheap to form and weld, but once the surface oxide layer gets scrubbed away by sand, aggregate, or frozen media, wear accelerates fast. Moving to an abrasion-resistant steel with a higher Brinell hardness often pays for itself because the drum shell stops bowing between supports and the paddle edges keep a cleaner scraping line against the inner wall.
Paddles live a harder life than the drum, so matching hardness and toughness matters more than chasing a single number. A very hard cast iron paddle can survive fine, dry material but may snap when it catches a large stone or a frozen clump. Softer polyurethane or rubber-tipped paddles handle impact and chemical exposure well, though they flex under heavy loads and may leave a thicker material heel. The best results usually come from mixed systems: a tough drum shell, replaceable wear liners in high-scrub zones, and paddles with a hardened face but a ductile backing.
Environmental exposure also influences material choice. Moisture, acidic mixes, or salt-laden materials can corrode exposed steel long before abrasive wear becomes visible, especially at welds and bolt holes. Stainless steel resists corrosion but costs more and can gall if fasteners are not chosen carefully. In wet or corrosive settings, sealed joints, compatible fasteners, and periodic rotation of wear parts often do more for lifespan than simply moving to a heavier plate.
Weld sequencing and stress relief before cracks can take hold
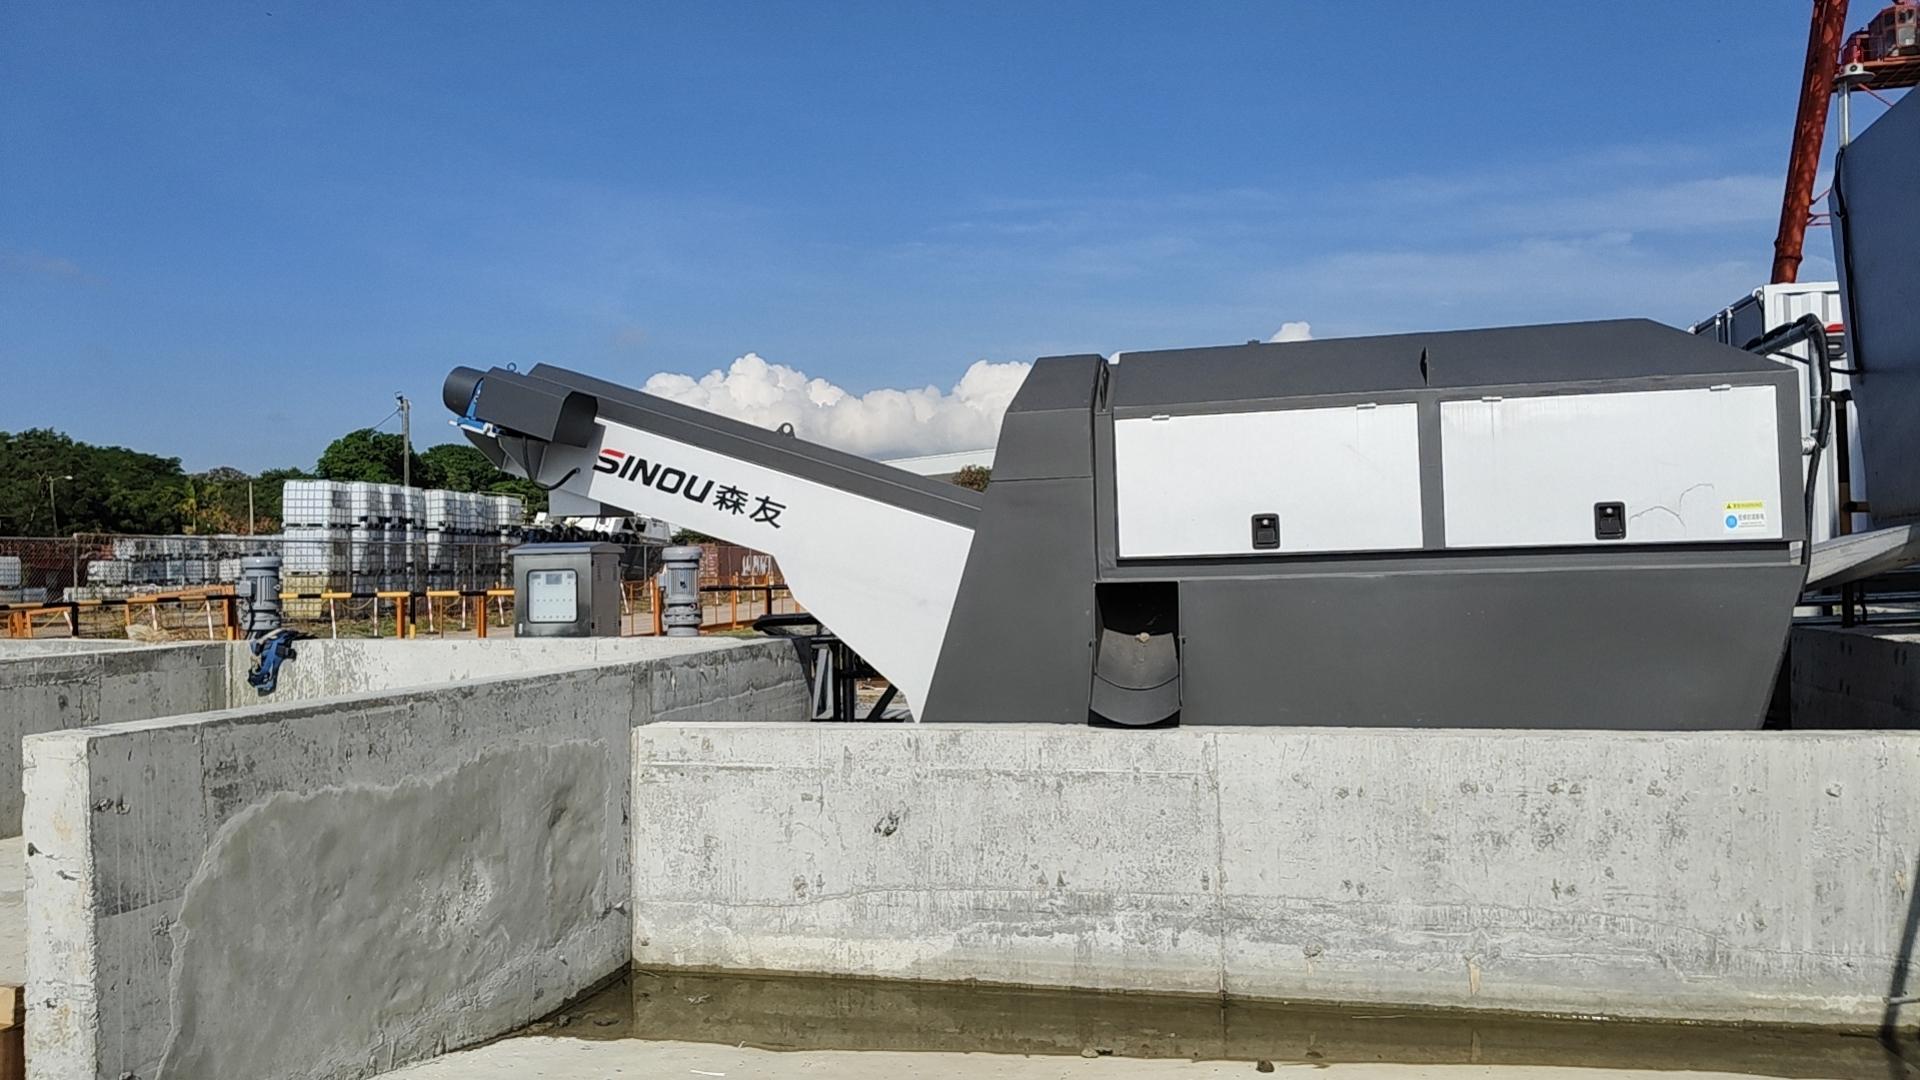
Weld sequencing is where most of the trouble either gets locked in or walked away from. On heavier sections, starting at the centre of a joint and moving toward the free edges lets each pass pull against less restraint. Skipping around the weld, balancing heat on both sides of the neutral axis, and keeping interpass temperatures steady do more to lower residual tension than any single post-weld fix.
Stress relief works best when it is treated as part of the weld plan, not as a rescue operation. A proper post-weld heat treatment needs a controlled ramp, a realistic soak time at temperature, and a slow cool through the brittle range. For parts that cannot go into a furnace, local heating bands or vibratory stress relief can take the edge off, but they are not interchangeable with furnace treatment on thick restrained joints.
The window that matters is between the last pass and the point where microcracks start linking up. If the sequence leaves sharp residual peaks, a few thermal cycles can open up defects that were barely visible. Getting the sequence and the stress relief scheduled before that happens keeps the problem physical rather than metallurgical.
Why bearing life usually fails before the drum ever wears out
A drum's shell can look nearly new even after years of service, yet the bearing fails. The reason comes down to how force travels through the assembly. The drum surface spreads load over a wide area, but the bearing carries concentrated stress at a single narrow contact line. Every rotation pushes that stress through the same tiny zone, creating microscopic pitting long before the drum shows visible wear.
Lubrication also plays a quiet but decisive role. Grease breaks down, gets contaminated, or simply migrates away from the rolling elements. Once the film thins, metal touches metal. The resulting heat accelerates fatigue, and from there the bearing's life drops sharply. A drum can tolerate dry friction for a while; a bearing cannot.
Misalignment makes things worse. Even a fraction of a degree forces the bearing to work against its own geometry, loading one edge of the raceway. That uneven pressure creates a failure chain that no drum thickness can prevent. In short, the drum wears by abrasion spread across a large surface, while the bearing wears by fatigue concentrated in a few millimeters of steel.
Abrasion lining fit-up and the gaps that turn into repair bills
Most liner failures don't start with worn-out ceramic or cracked plate. They start during fit-up, when a 6 mm gap gets called close enough and the crew moves on. The problem is that the gap doesn't stay empty. Fine material works into it, packs behind the liner, and starts prying from the back. By the time the bolts loosen or the welds crack, the repair has already become more expensive than the original installation.
A tight fit-up is not about chasing zero clearance on every edge. It means the liner sits flat against the shell, corners are trimmed instead of forced, and the fastening sequence pulls the panel into contact without leaving a void under the middle. When those gaps are ignored, the next invoice tends to include more than replacement liners. It includes hammering out deformed plate, rebuilding worn base metal, and paying overtime because the line is down.
The cheaper fix happens before the first bolt goes in. Keeping a grinder and a straightedge nearby, checking the back side of the liner, and rejecting panels that rock on a high spot all cost less than the hidden gap that turns a routine liner swap into a structural repair.
Spray bar placement and nozzle angles that keep cement from packing in
Mounting the spray bar slightly below the top tangent of the drum keeps the initial spray from glancing off the flight bars. A shallow downward angle, usually 15 to 25 degrees off vertical, pushes the water or admixture into the folding zone instead of letting it puddle near the shroud where paste tends to collect.
Stagger the nozzles so each cone overlaps by roughly a third at the point where the cement first meets the stream. Pointing every nozzle straight at the centerline often creates a wet stripe with dry shoulders, while rotating the outer tips slightly toward the inlet wall clears the corners that normally pack first.
If the mix still balls up, raise the bar an inch or bring the outer nozzles from 45 degrees down to 30 before increasing water volume. That small shift moves the impact point enough to break up the dead zone without over-wetting the discharge side.
Corrosion control steps for wash water, fines, and idle weekends
Wash water becomes more corrosive when chlorides and acidic carryover from the process are allowed to concentrate in slow-moving rinse lines. After the last wash cycle, open the low-point drains while the piping is still warm, then blow the spray bars and dead legs clear with compressed air. Fines add another layer of risk because they pack into crevices and keep a damp, oxygen-depleted film against the steel. Rinsing from the top down with clean water and following with an air lance across the headers will lift those deposits before they harden into a corrosion cell.
When a weekend idle is planned, avoid leaving surfaces in a half-wet condition. Once the final rinse is complete, leave the drains open and place vapor-phase corrosion inhibitor emitters inside the manways or access ports. Keep the doors closed to reduce condensation swings, and if the equipment can be rotated, bump the rolls or pumps once on Saturday to break up any waterline film that may be starting to form.
FAQ
The drum wants abrasion-resistant plate, but the hopper has to handle impact as well as wet sand. Run AR plate in the drum and use replaceable polyurethane or rubber liners in the hopper. Mapping out where wear actually concentrates will do more than lining everything at the same thickness.
Most of the time the frame is too rigid near the screen cradle. A continuous weld around the mount plate pulls heat into the crossmember and creates a stiff edge that concentrates stress. Intermittent welds, a small gap under the plate, and gussets kept away from high-flex zones prevent more cracks than adding heavier steel.
In the high-wear areas, yes, if the base metal is clean and preheated. Hardfacing over mill scale or damp steel traps moisture and tends to spall off in sheets. The bond matters more than the amount of weld laid down.
The water is loaded with fine cement and aggregate, so bare carbon steel corrodes once the pH shifts. Stainless or a two-part epoxy helps, but the detail that gets missed is keeping these surfaces smooth and accessible so sediment cannot sit in crevices and start corrosion.
For most plants, yes, because a liner swap takes hours instead of cutting out and rewelding bars. The liner backing plate has to be flat and well supported, or the liner flexes and the bolts work loose. That is a fabrication issue, not a liner issue.
Any joint that will come apart for screen changes, bearing replacement, or auger repair should be bolted. Welding everything into one rigid frame looks strong but makes servicing the machine expensive. Slotted holes or jack points help when parts need realignment later.
Keep flight clearance consistent and make sure the housing is rolled round. If it is slightly out of round, the auger contacts one point and wears a groove quickly. Machined end rings and careful fit-up give more life than moving up a wall thickness.
Discharge chutes take impact and go through constant wet and dry cycles. A high-build epoxy alone often chips, so a tough primer with a polyurethane topcoat or a rubber-lined chute works better. Extend the coating past the obvious wear area and allow a full cure before the machine goes to work.
Conclusion
Long service starts before the first weld. Drum and paddle material selection has to account for both abrasive fines and the chemistry of wash water; abrasion-resistant plate with a slight hardness advantage over the aggregate usually pays for itself, but only if the paddles are not so brittle that they crack under impact. Weld sequencing is where many drums pick up hidden stress. If stiffeners and drive flanges are pulled into place with heavy single-pass welds, the drum can distort and locked-in stress will find the nearest weak point once the reclaimer starts shaking. It's often cheaper to stagger shorter passes, back-step, and stress relieve accessible sections than to chase cracks through a rotating assembly later. Bearing life is another detail that gets overlooked until a failure stops the plant. The bearings tend to see more water, grit, and misalignment than the drum shell does abrasion, so sealing, housing alignment, and greasing intervals usually determine whether a reclaimer reaches its design life.
Abrasion lining fit-up has to be treated as a precision job, not just cutting sheets to rough size. If the liner sits proud or leaves a gap at the seams, fines pack into the void, harden into a wedge, and eventually pry the liner loose or wear the shell underneath. A tight fit with staggered joints and a small bevel for weld access prevents most of that. Spray bar placement is just as important because a poorly aimed nozzle lets cement paste build up on the drum walls and throws the drum out of balance. Nozzles should be angled to wash the entire width of the drum, with quick-disconnect fittings so plugged tips are cleaned before the next batch. Corrosion control covers the idle periods as much as production. Wash water and fines are aggressive enough, but they do more damage when the machine sits wet over a weekend. Draining low points, rinsing exposed steel, and keeping the reclaim area free of standing slurry slows pitting and extends the intervals between major rebuilds.
Contact Us
Contact Person: HaiYan
Email: [email protected]
Tel/WhatsApp: +86 18957325588
Website: https://www.senyoubeton.com/